Installing a virtual machine on a Mac using VirtualBox (with shared folders)

This post describes how to set up a virtual machine, specifically the AMD server version of Ubuntu 18.04.2, using VirtualBox on a Mac. It also describes how to set up a shared folder between host (i.e., MacOS) and guest (i.e., Ubuntu server running Linux).
As with many other software installation/set-up guides, this works for me, and you may very well need to change some implementation details to get everything to work for you on your machine; specifically, everywhere danielfarlow appears below needs to be changed to your username on your Mac (i.e., the host machine), which you can obtain by running whoami or echo "$USER" in bash — the same goes for dwf on the guest machine (this will all make sense as you go through this post).
For reference, I am using a MacBook Pro (2018) with the following specs:
- Processor:
2.2 GHz 6-Core Intel Core i7 - Memory:
16 GB 2400 MHz DDR4 - macOS:
Ventura 13.2.1
Installing VirtualBox
Download application
I'll be downloading the VirtualBox 7.0.6 platform package for macOS / Intel hosts and working from a clean install. Once the download has completed, step through the installer to set everything up on your system (accepting default options along the way). Once you've completed the steps in the installer and have opened the VirtualBox application, then you should be greeted with a screen that looks something like the following:
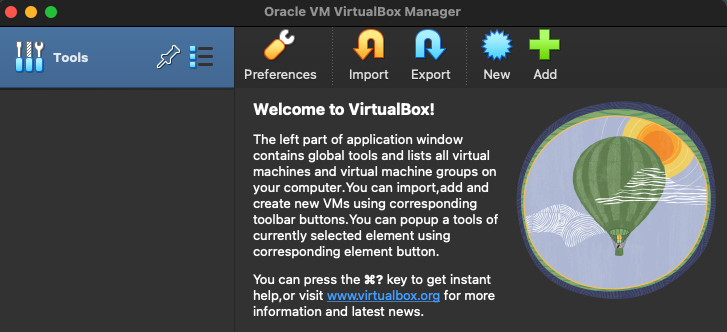
You should now be all set to use VirtualBox. Well, almost.
Clean up preseed script
If you are installing the Ubuntu desktop version (as opposed to the server version), then you can ignore the guidance concerning the preseed script since the preseed script only executes if you are installing the server version.
If you immediately proceed to trying to download the Ubuntu server and set it up as a virtual machine via VirtualBox, then the installation will result in an error. A "preseed script" will fail to execute. This is discussed on various VirtualBox forum threads, namely here and here. Fortunately, there's somewhat of an "easy" fix.
Navigate to the UnattendedTemplates directory installed on your system via VirtualBox and list out the directory contents:
$ cd /Applications/VirtualBox.app/Contents/MacOS/UnattendedTemplates
$ ls -l
total 312
-rw-r-xr-x@ 1 root  admin  11440 Jan 11 10:42 debian_postinstall.sh*
-rw-r-xr-x@ 1 root  admin   3331 Jan 11 10:42 debian_preseed.cfg*
-rw-r-xr-x@ 1 root  admin   2165 Jan 11 10:42 fedora_ks.cfg*
-rw-r-xr-x@ 1 root  admin   2164 Jan 11 10:42 lgw_ks.cfg*
-rw-r-xr-x@ 1 root  admin  17596 Jan 11 10:42 lgw_postinstall.sh*
-rw-r-xr-x@ 1 root  admin   2680 Jan 11 10:42 ol_ks.cfg*
-rw-r-xr-x@ 1 root  admin  12231 Jan 11 10:42 ol_postinstall.sh*
-rw-r-xr-x@ 1 root  admin  15582 Jan 11 10:42 os2_cid_install.cmd*
-rw-r-xr-x@ 1 root  admin   7574 Jan 11 10:42 os2_response_files.rsp*
-rw-r-xr-x@ 1 root  admin   7878 Jan 11 10:42 os2_util.exe*
-rw-r-xr-x@ 1 root  admin   2681 Jan 11 10:42 redhat67_ks.cfg*
-rw-r-xr-x@ 1 root  admin  11653 Jan 11 10:42 redhat_postinstall.sh*
-rw-r-xr-x@ 1 root  admin   3930 Jan 11 10:42 rhel3_ks.cfg*
-rw-r-xr-x@ 1 root  admin   3298 Jan 11 10:42 rhel4_ks.cfg*
-rw-r-xr-x@ 1 root  admin   3184 Jan 11 10:42 rhel5_ks.cfg*
-rw-r-xr-x@ 1 root  admin   4122 Jan 11 10:42 ubuntu_preseed.cfg*
-rw-r-xr-x@ 1 root  admin   1859 Jan 11 10:42 win_nt5_unattended.sif*
-rw-r-xr-x@ 1 root  admin  14535 Jan 11 10:42 win_nt6_unattended.xml*
-rw-r-xr-x@ 1 root  admin   7344 Jan 11 10:42 win_postinstall.cmd*
The highlighted line above shows the file (i.e., ubuntu_preseed.cfg) containing preseed script details we will need to update. The VirtualBox forum threads linked above make it clear what the issue is in this file (offending line highlighted in red below):
...
# Custom Commands
d-i preseed/late_command string cp /cdrom/vboxpostinstall.sh /target/root/vboxpostinstall.sh \
 && chmod +x /target/root/vboxpostinstall.sh \
 && /bin/bash /root/vboxpostinstall.sh --preseed-late-command
...
The line
&& /bin/bash /root/vboxpostinstall.sh --preseed-late-command
needs to be changed to
&& /bin/sh /target/root/vboxpostinstall.sh --need-target-bash --preseed-late-command
resulting in the following:
...
# Custom Commands
d-i preseed/late_command string cp /cdrom/vboxpostinstall.sh /target/root/vboxpostinstall.sh \
 && chmod +x /target/root/vboxpostinstall.sh \
 && /bin/sh /target/root/vboxpostinstall.sh --need-target-bash --preseed-late-command
...
But to make this change you'll need to edit ubuntu_preseed.cfg, which is currently not possible due to file ownership issues (see the output from ls -l above). An easy fix is to change file ownership by means of chown, make the single-line update, and then optionally change ownership back:
$ sudo chown danielfarlow:staff ubuntu_preseed.cfg
Now use your favorite editor (e.g., vim, nano, VSCode, etc.) to make the single-line change described above. Save the file and (optionally) change ownership back to its original state:
$ sudo chown root:admin ubuntu_preseed.cfg
ubuntu_preseed.cfgIf you are having issues editing the ubuntu_preseed.cfg file, then go old school and simply copy the file to your desktop, edit it there, and then drag the file back into the UnattendedTemplates directory and confirm that it should replace the current file.
Making the changes above may save you some headache down the road.
Installing Ubuntu server
Download Ubuntu server
First things first: make sure you download the right ISO file! I downloaded the desktop version when I meant to download the server version. What's the difference? There is one. Hence, download ubuntu-18.04.2-server-amd64.iso.
Set up new virtual machine in VirtualBox
Specify machine name and operating system
Specify the name you want to give your virtual machine, the folder where its contents should be stored, and the ISO image (downloaded above) that will be used to install the guest operating system (i.e., Linux):
- Name:
dwf-vm-ubuntu-18-04-2 - Folder:
/Users/danielfarlow/VirtualBox VMs - ISO Image:
/Users/danielfarlow/Downloads/ubuntu-18.04.2-server-amd64.iso
If you specified the information above, then your screen should look as follows:
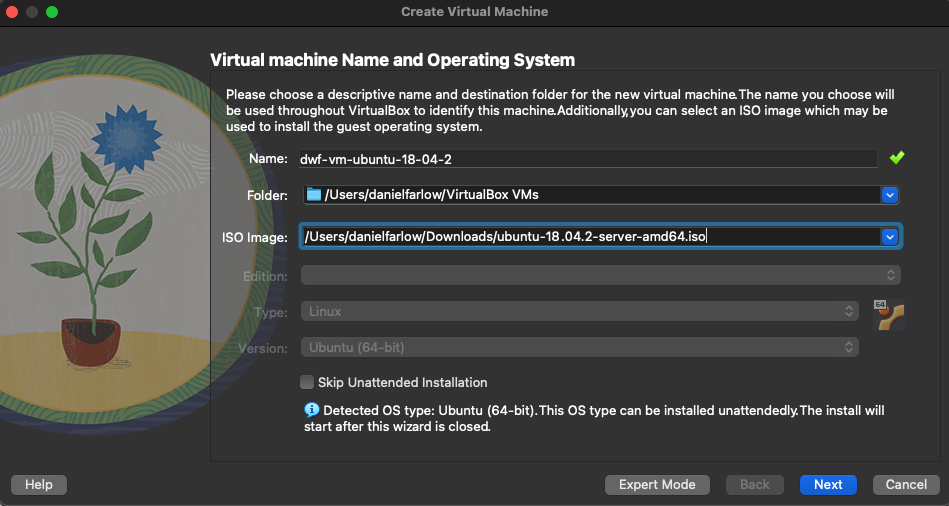
Click the "Next" button.
Complete unattended guest OS install setup
Now specify the username you want to use on your virtual machine as well as a password. Additionally, check the box for Guest Additions (this will make it possible for us to more easily set up a shared folder later):
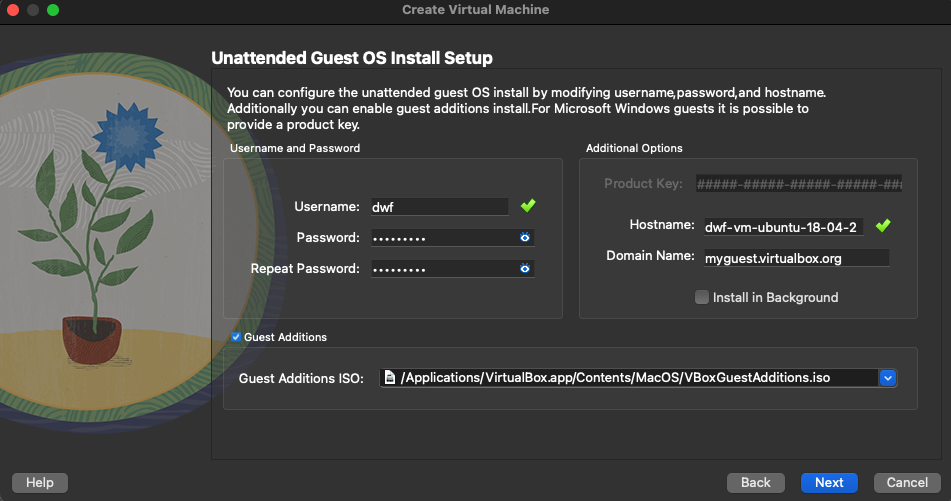
Click the "Next" button.
Specify amount of virtual hardware RAM
Specify 4GB (4096 MB) of RAM and a virtual CPU count of 1:
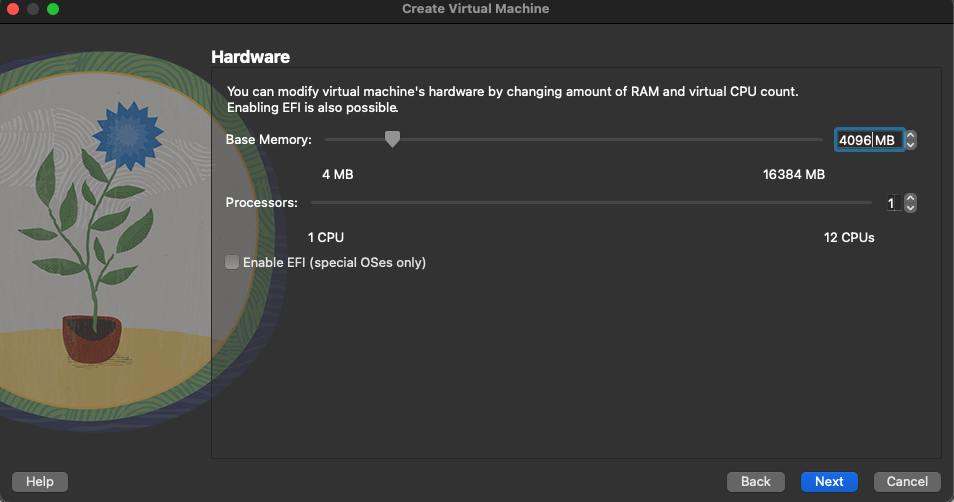
Click the "Next" button.
Specify virtual hard disk size
Specify 8GB for the virtual hard disk:
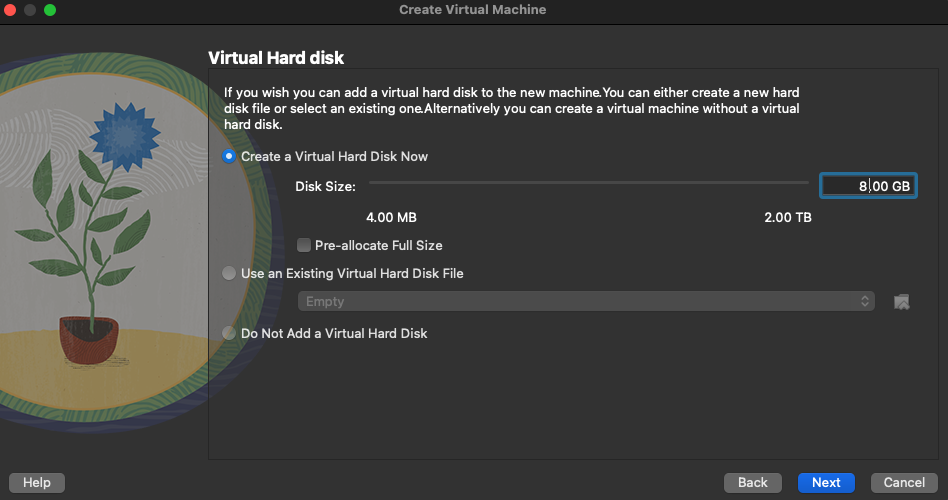
Click the "Next" button.
Review summary
You should now be able to see a summary of what all you are about to set up for your virtual machine:
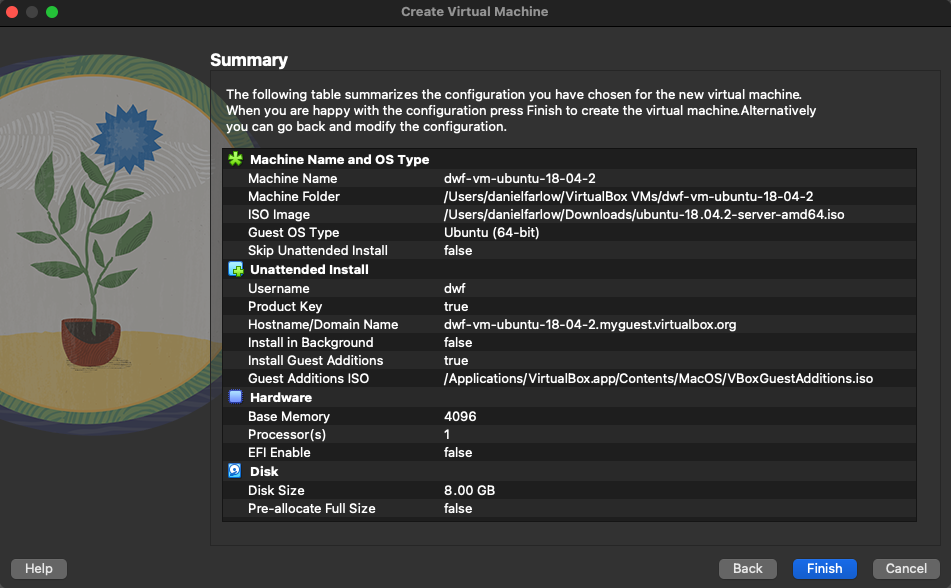
Click the "Finish" button. It may take a little while for the setup to complete. At some point you may see Running preseed..., and you will be glad you fixed the ubuntu_preseed.cfg file as previously described (otherwise Running preseed... will error out). Once the set up is finished, you should see a screen like the following:
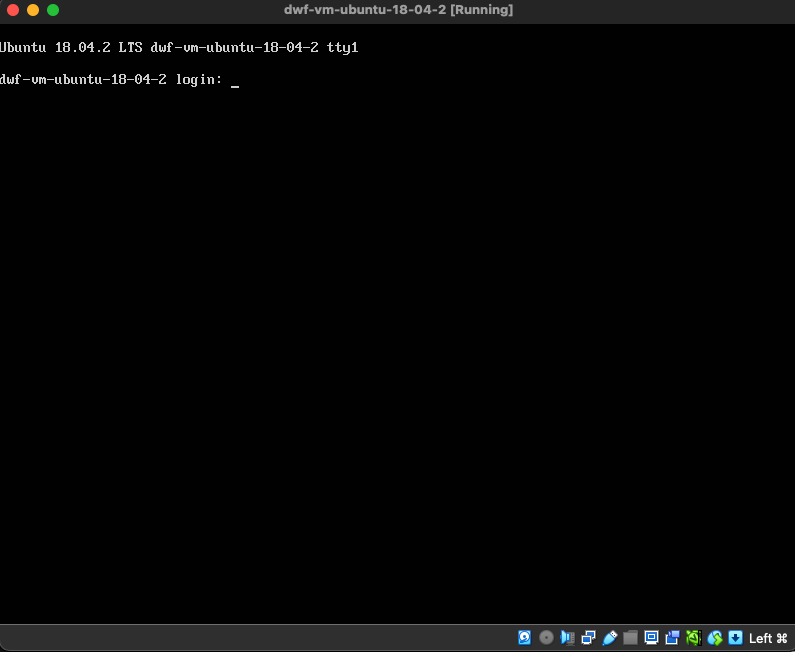
Now you can provide your virtual machine username (dwf in my case) as well as your password (when prompted). Once you have logged in, you should see something like the following:
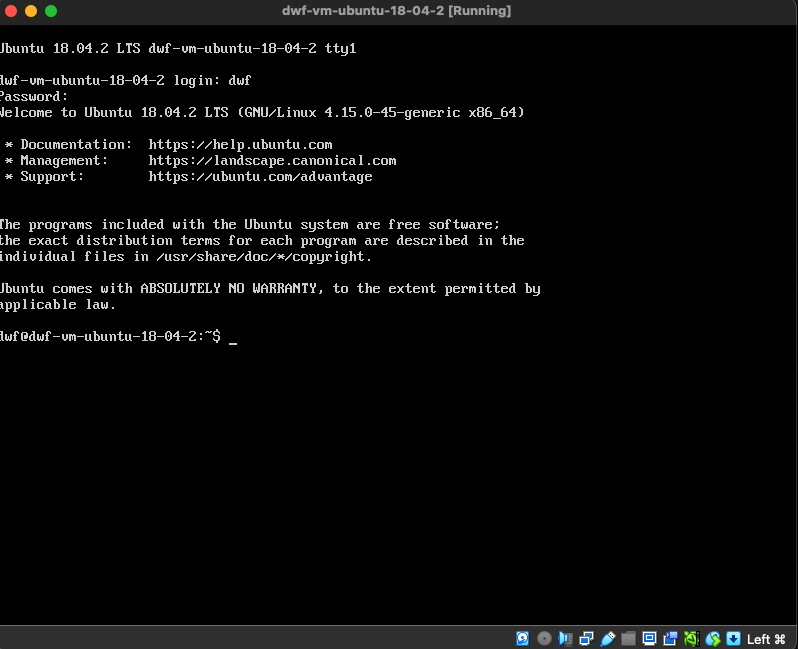
Congrats! Now your virtual machine is up and running.
Configuring Ubuntu server for ssh access from host
Add your user to sudo group
Assuming you've followed all the steps above concerning installing the Ubuntu server on your virtual machine and you are logged in, try a simple command:
$ echo Hi
Hi
Cool. That worked. Now try running the same command but with sudo:
$ sudo echo Hi
dwf is not in the sudoers file. This incident will be report.
That sounds ominous. We can follow this post to add our user to the sudoers file:
$ su root
$ apt-get install sudo -y
$ adduser dwf sudo
$ chmod 0440 /etc/sudoers
$ exit
Close the terminal emulator to shutdown your system completely for the changes to take effect (confirm that you want to "Power off the machine").
The command sudo shutdown -r now may be used in the future to shutdown and reboot, but you cannot use this command yet because your user has not been added to the sudo group (shutting down the system and rebooting will fix this).
Now start up your machine and log in. You should now be able to run commands with sudo:
$ sudo echo Hi
Hi
Keep your machine up and running for the next step below.
Install an OpenSSH server
We want to install an OpenSSH server to make it possible to ssh into our guest from our host. We can use this guide to help us in this process. First install the server (confirm that you want to allocate the requested space for this installation):
$ sudo apt install openssh-server
You can check the status of the server as follows:
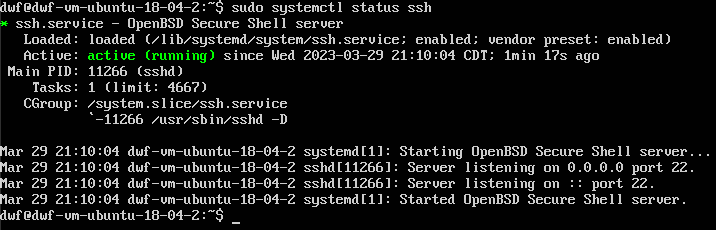
$ sudo systemctl status ssh
You should see something like the following:
As the linked article notes:
By default, VirtualBox creates a Network Address Translation (NAT) adapter for your virtual machines. This allows your virtual machine to access the internet but prevents other devices from accessing it via SSH.
To configure the network, you need to use VirtualBox port forwarding and the default NAT adapter your VM is attached to. Note that VirtualBox provides many other networking configuration options such as a bridged adapter, which you can use to SSH into guest OSes, but that's a topic for another day.
We will set up port forwarding below.
Set up port forwarding
Start by finding your Linux IP address:
$ ip -4 addr
You should see something like the following:

With this information, we can set up port forwarding effectively. In VirtualBox, click the Settings cog for the machine we are currently running. Then navigate menu selections as follows:
Network -> Advanced -> Port Forwarding
Click to add a new port forwarding rule, and specify the appropriate values:
| Name | Protocol | Host IP | Host Port | Guest IP | Guest Port |
|---|---|---|---|---|---|
SSH port forwarding | TCP | 127.0.0.1 | 2222 | 10.0.2.15 | 22 |
Then click "OK" to exit the port forwarding rules menu, and then click "OK" again in the Network menu for the changes to be saved. Power off the machine.
Test the ssh setup
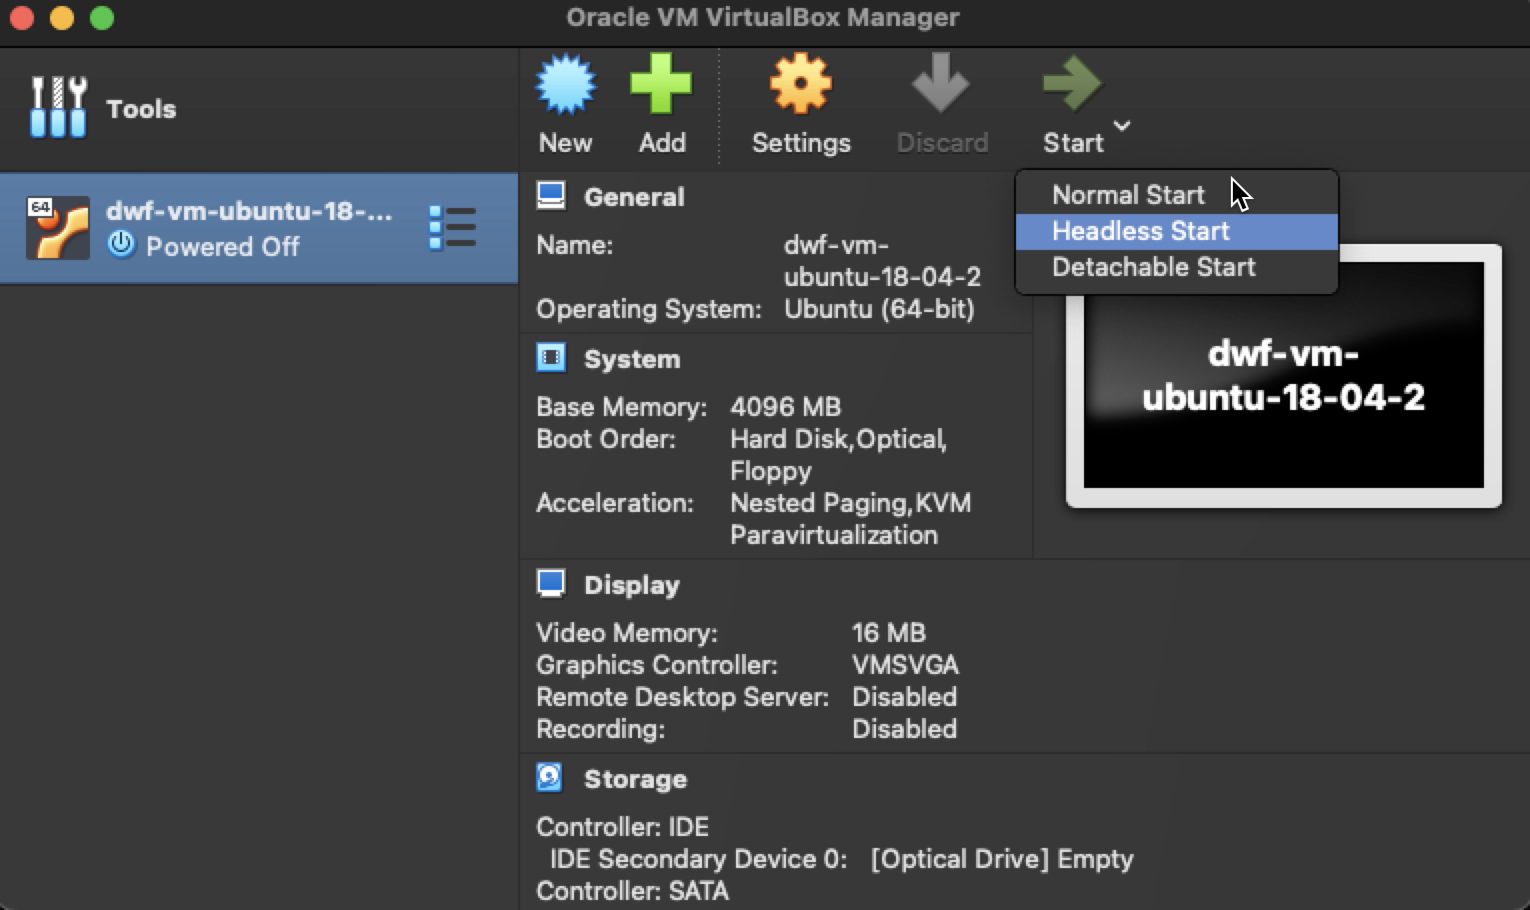
All of the changes made above should now be in effect. Start up the machine again but this time as a headless start (i.e., without a terminal emulator):
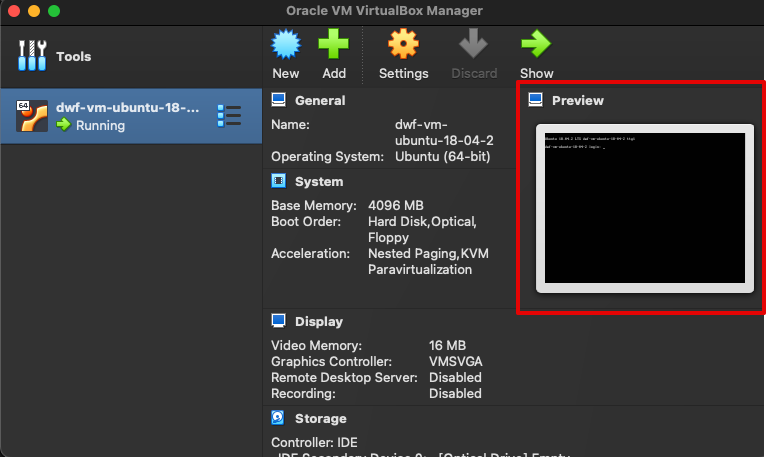
You should be able to see in VirtualBox's "Preview" that the machine is starting up. Wait for the machine to reach the log in screen (this may take up to a minute on your first time doing this):
Now we can finally test our ability to ssh into our virtual machine:
$ ssh -p 2222 dwf@127.0.0.1
You will likely see a message along the following lines:
The authenticity of host '[127.0.0.1]:2222 ([127.0.0.1]:2222)' can't be established.
ED... key fingerprint is SHA256:...
This key is not known by any other names
Are you sure you want to continue connecting (yes/no/[fingerprint])?
Specify yes. You should then be logged in and able to list out all the contents in your /home/dwf directory:
dwf@dwf-vm-ubuntu-18-04-2:~$ ls -al
total 32
drwxr-xr-x 5 dwf  dwf  4096 Mar 29 22:04 .
drwxr-xr-x 3 root root 4096 Mar 29 19:03 ..
-rw------- 1 dwf  dwf   425 Mar 29 22:04 .bash_history
-rw-r--r-- 1 dwf  dwf   220 Mar 29 19:03 .bash_logout
-rw-r--r-- 1 dwf  dwf  3771 Mar 29 19:03 .bashrc
drwx------ 2 dwf  dwf  4096 Mar 29 20:50 .cache
drwx------ 3 dwf  dwf  4096 Mar 29 20:50 .gnupg
-rw-r--r-- 1 dwf  dwf   807 Mar 29 19:03 .profile
-rw-r--r-- 1 dwf  dwf     0 Mar 29 21:05 .sudo_as_admin_successful
Power off your machine.
If you are like me, then maybe you made a misstep somewhere along the way. If you are having an issue sshing into your server, then you could have a "known hosts" issue (among other things). Check the file /Users/danielfarlow/.ssh/known_hosts on your host. You may need to remove recently added contents due to previously failed attempts.
Creating a shared folder between host and guest
Suppose you want to be able to "share" files between host and guest (e.g., you would like to be able to create a file on your host machine but would also like to be able to access it on your guest machine and vice-versa). This guide, based on another guide, will hopefully make it possible for you to achieve this goal.
Create shared folder on host
Start by creating a shared folder on your host wherever your virtual machine is located. In my case:
$ mkdir "/Users/danielfarlow/VirtualBox VMs/dwf-vm-ubuntu-18-04-2/shared"
Link shared folder via VirtualBox
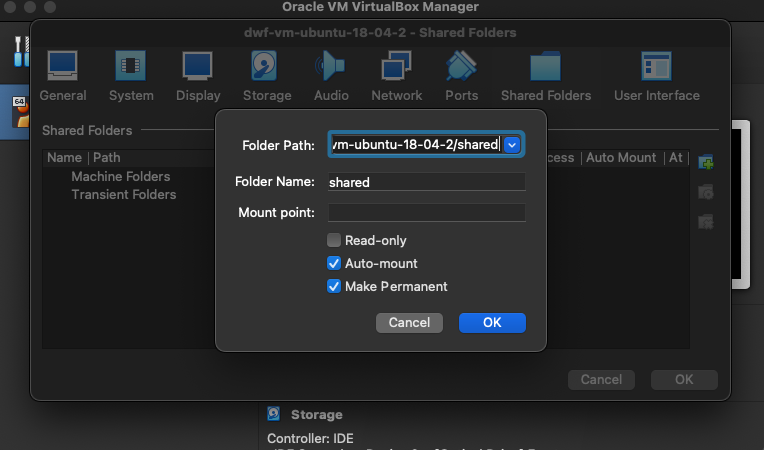
Start up your virtual machine normally (i.e., not in headless mode). Click the Settings cog for your virtual machine that should now be running. Navigate to the "Shared Folders" menu option, specify the folder path (either directly or by using your system file finder), the folder name (i.e., shared), and then leave the mount point and read-only options blank, but check "Auto-mount" and "Make Permanent":
Insert Guest Additions CD image
With the VM started, running, and the guest terminal emulator in focus, click on the "Devices" menu (this menu will only show up when the VM terminal emulator is in focus), and then click "Insert Guest Additions CD image...".
Within the virtual machine terminal emulator, use the following command to mount the CD:
$ sudo mount -t iso9660 /dev/cdrom /media/cdrom
You may see a message like
mount: /media/cdrom: WARNING: device write-protected, mounted read-only
That's to be expected. Now install dependencies for VirtualBox guest additions:
$ sudo apt-get update
$ sudo apt-get install -y build-essential linux-headers-`uname -r`
Note that the second command above needs to be run as is. Do not modify it in any way. Now run the installation script for the guest additions (wait until the installation completes):
$ sudo /media/cdrom/./VBoxLinuxAdditions.run
Once the process above has completed, shut down and reboot the virtual machine:
$ sudo shutdown -r now
Configuring the shared folder on the guest
Create a shared_folder directory in your virtual machine's home (the name needs to be different from the shared folder previously created on the host):
$ mkdir ~/shared_folder
Add user access to shared folder:
$ sudo usermod -aG vboxsf $USER
Shutdown and reboot virtual machine for the change to take effect:
$ sudo shutdown -r now
Now mount the shared folder from the host to the guest ~/shared_folder directory:
$ sudo mount -t vboxsf shared ~/shared_folder
The host folder should now be accessible inside the virtual machine:
$ cd ~/shared_folder
$ sudo touch cool.txt
You should now see cool.txt in both the shared_folder on the virtual machine as well as the shared folder on the host.
Persistent mounting of shared folder
The directory mount made above is temporary and it will disappear on next reboot. To make the mounting truly permanent, we will set it so that it will mount our ~/shared_folder directory on system startup.
Edit the fstab file in the /etc directory:
$ sudo nano /etc/fstab
Add the following line to fstab (separated by tabs). Make sure to replace <username> with your username:
shared /home/<username>/shared vboxsf defaults 0 0
The file should look something like the following:
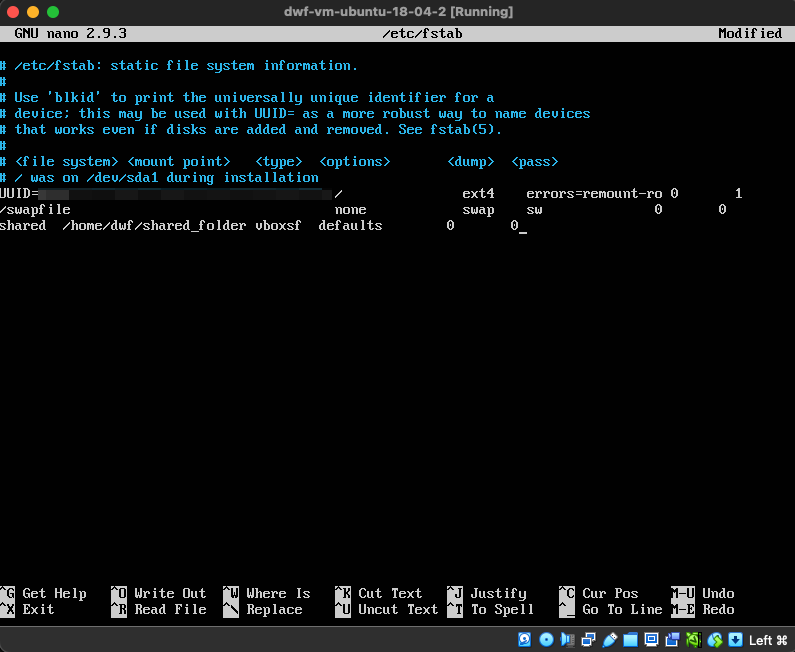
Save the file (^X -> Y -> Enter). Now edit the modules file:
$ sudo nano /etc/modules
Add the following line to /etc/modules:
vboxsf
Save the file. Shut down and reboot the machine:
$ sudo shutdown -r now
You should now be all set (hopefully).
VirtualBox CLI (managing VMs from the terminal)
VBoxManage is the command line interface (CLI) to VirtualBox. The CLI makes it possible for you to easily manage your machines (e.g., start, power off, reboot, etc.) from the command line. Some of the more useful CLI options are covered below, but you can run VBoxManage help for a comprehensive listing of its capabilities.
Listing machines and their current state
As this post notes, you can list your available virtual machines by means of the following command:
$ VBoxManage list vms
As this post notes, the command above can be repurposed to give a potentially more useful output than it would normally:
$ VBoxManage list vms --long | grep -e "Name:" -e "State:" | grep -v -e "Host path:"
Name:                        dwf-vm-ubuntu-18-04-2
State:                       running (since 2023-03-30T22:56:51.844000000)
This may help you determine whether or not you need to start or stop your machine (among other actions).
Starting the machine
You can start your machine in headless mode as follows:
$ VBoxManage startvm "dwf-vm-ubuntu-18-04-2" --type headless
Or if you want the GUI present:
$ VBoxManage startvm "dwf-vm-ubuntu-18-04-2" --type gui
Stopping the machine
You can power off your machine as follows:
$ VBoxManage controlvm "dwf-vm-ubuntu-18-04-2" poweroff